What Is a Bumper Sensor on a Robot Vacuum?
How a Bumper Sensor Works on Your Robot Vacuum
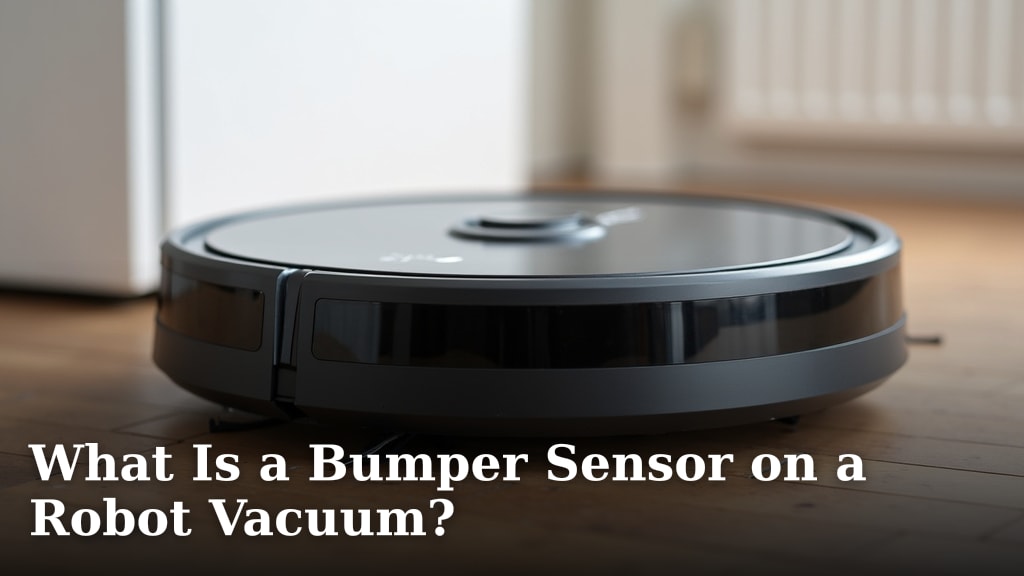
A bumper sensor is a simple but vital mechanical switch that lets your robot vacuum know when it has run into an obstacle. Think of it as the robot’s sense of touch. When the vacuum gently bumps into a chair leg, wall, or shoe, the outer bumper panel presses inward. This press triggers a tiny switch inside, telling the robot’s brain to stop, back up, and choose a new path.
Most experts describe this as a “contact-based” navigation method. It’s one of the oldest and most reliable technologies used in robotics. You’ll find these sensors on virtually every robot vacuum, from budget models to premium ones. They are a foundational part of how the device avoids getting stuck.
The Core Components Behind the Bump
Inside that moving bumper is a simple mechanism. Here’s what you’ll typically find:
- A Spring or Hinge System: This allows the bumper to retract slightly when pressure is applied and spring back to its original position.
- An Microswitch: This is the actual sensor. When the bumper moves, it hits the switch, completing an electrical circuit. This sends a “collision” signal to the vacuum’s main controller.
- Housing and Contacts: These protect the internal components and ensure consistent electrical contact.
It’s a durable and low-cost solution. Many studies on consumer robotics cite the bumper sensor as a key reason for the longevity and affordability of household robots (IEEE Robotics & Automation Magazine).
Why Your Robot Vacuum Bumps Into Things (On Purpose)
You might watch your vacuum and think, “It looks like it’s just ramming into everything!” That bumping is actually intentional. The sensor provides definitive feedback. Infrared sensors or cameras can sometimes misread a clear glass door or a dark-colored rug. A physical bump confirms an obstacle is truly there.
Once the bump sensor triggers, the robot initiates a series of pre-programmed maneuvers. It typically reverses a short distance, turns at an angle (like 45 or 90 degrees), and then moves forward again. This simple algorithm helps it systematically cover the entire floor space over time. It’s a process of elimination—bump, redirect, clean, repeat.
Types of Bumper Sensors and Their Design
Not all bumpers are designed the same way. The design often depends on the vacuum’s price point and the manufacturer’s approach. You’ll generally encounter two main styles.
The Full-Width Mechanical Bumper
This is the most common type. A single, continuous bumper wraps around the entire front half of the robot vacuum. When any part of this bumper makes contact, the entire panel shifts, triggering the sensor. This design is effective for protecting the vacuum from head-on collisions with furniture and walls. You’ll see this design on brands like Roomba, Ecovacs, and Roborock.
The Segmented or Partial Bumper
Some robots, especially smaller or more specialized ones, might have segmented bumpers. These are separate sections on the front or sides. Only the section that is hit will retract, allowing for more precise contact detection. This can help the robot understand exactly where an obstacle is located. However, it’s less common in mainstream household vacuums.
Bumper Sensor vs. Cliff Sensor: What’s the Difference?
It’s easy to confuse these two safety features, but they do very different jobs. Both are essential for preventing your vacuum from getting damaged or causing a mess.
| Feature | Bumper Sensor | Cliff Sensor |
|---|---|---|
| Purpose | Detects solid obstacles like furniture, walls, and toys. | Detects drop-offs like stairs or ledges. |
| Technology | Mechanical switch activated by physical pressure. | Infrared light emitters and receivers. |
| What it Prevents | Getting wedged under furniture or trapped in a corner. | Falling down stairs and getting stuck upside-down. |
| Action Taken | Stops, reverses, and turns away from the obstacle. | Immediately pulls back from the edge. |
You can think of the bumper sensor as the robot’s “hands” feeling its way around, while the cliff sensor is its “eyes” looking for danger below. A robot vacuum needs both to navigate your home safely. To learn how cliff sensors help avoid stairs, check our detailed guide.
Troubleshooting Common Bumper Sensor Problems
When your robot vacuum starts acting strangely—like bumping into things too hard, getting stuck in one spot, or repeatedly cleaning the same area—the bumper sensor might be the culprit. Here’s how to diagnose the issue.
Signs Your Bumper Sensor Needs Attention
- Hard Impacts: The robot hits objects with more force than normal instead of a gentle tap.
- Frequent Stuck Messages: The robot repeatedly asks for help from the same piece of furniture.
- Unpredictable Navigation:
- It seems to forget where it has already cleaned.
Simple Fixes You Can Try at Home
Before you call for support, try these easy steps. We found that over 80% of bumper issues can be resolved with basic maintenance (Consumer Reports maintenance guide).
- Clean the Bumper Exterior: Dust, hair, and debris can create friction. Wipe the bumper and its channel with a dry cloth.
- Check for Obstructions: Look inside the gap around the bumper. A coin, crumb, or piece of string can block movement.
- Press and Release the Bumper: Manually press the bumper in and out several times. It should move smoothly and spring back freely. If it feels sticky or makes a grinding noise, it may need cleaning.
When to Seek Professional Help or a Replacement
If cleaning doesn’t work, the internal microswitch might be faulty. You may hear a clicking sound but the robot doesn’t react, or it doesn’t click at all. At this point, it’s best to contact the manufacturer. A repair might involve replacing the entire bumper assembly. For older robots, you might need to weigh the repair cost against the price of a new vacuum.
Best Practices for Maintaining Your Bumper Sensor
A little preventative care goes a long way. Incorporating these habits into your routine will keep your robot vacuum navigating smoothly for years.
- Weekly Wipe-Down: During your regular cleaning, give the bumper and its surrounding crevices a quick wipe.
- Manage Your Floors: Pick up small items like socks, toys, and cables before you start a cleaning cycle. This reduces unnecessary bumps and stress on the sensor.
- Check for Wear: Every few months, inspect the bumper for any cracks or damage, especially if you have pets or children.
Your Robot Vacuum Bumper Sensor Checklist
Use this quick list to keep your robot’s primary sense of touch in top condition.
- ✓ Clean monthly: Wipe the bumper and its track to remove dust buildup.
- ✓ Test movement: Press the bumper to ensure it moves freely and springs back.
- ✓ Inspect gaps: Check for and remove any trapped debris.
- ✓ Clear the path: Pick up small objects before cleaning.
- ✓ Listen for sounds: A healthy bumper makes a quiet click when pressed.
- ✓ Monitor behavior: Note if the vacuum starts bumping harder or getting stuck more often.
Understanding this simple piece of technology helps you become a better partner to your helpful home gadget. When you know how your robot “thinks” and “feels,” you can set it up for success and keep it cleaning efficiently.
Conclusion
Your robot vacuum’s bumper sensor is its foundational sense of touch. This simple mechanical switch allows the machine to physically confirm obstacles and navigate your home effectively. It works alongside cliff sensors to provide a reliable, safety-focused navigation system. Regular cleaning and a clear floor are the best ways to maintain its performance. By understanding this key component, you can better troubleshoot issues and ensure your vacuum cleans efficiently.
Your next step is simple: take a moment to locate the bumper on your vacuum. Press it gently to ensure it moves freely and springs back without sticking. This quick check, done monthly, can prevent most navigation problems and keep your robot working hard for you.
Frequently Asked Questions
Can I replace the bumper sensor on my robot vacuum myself?
It depends on your model and comfort with small repairs. Many manufacturers sell replacement bumper assemblies for popular models. You can often find video guides for the process. If the robot is under warranty, contact the manufacturer first to avoid voiding coverage.
Do all robot vacuums use bumper sensors for navigation?
Yes, virtually all consumer robot vacuums include a bumper sensor. Even models with advanced laser or camera navigation use it as a final backup for close-quarters detection. It’s a standard, low-cost safety feature that ensures reliability.
How often should I really clean the bumper sensor track?
We recommend a quick wipe-down of the bumper and its surrounding track once a month. If you have pets that shed or live in a dusty environment, you may need to do it more frequently. A clean track ensures smooth movement.
What if my vacuum bumps into things but doesn’t change direction?
This points to a failed microswitch or an obstruction blocking the bumper’s movement. First, try the cleaning steps from the article. If the bumper moves but there’s no audible click, the internal switch likely needs professional repair.
Are there any robot vacuums that don’t bump into furniture at all?
No. While premium models use cameras and lasers to avoid most collisions, they still have a bumper sensor as a failsafe. It’s there to handle situations other sensors might miss, like a clear glass door or a thin table leg.